
3
Textured ceilings were once the darling of residential construction. From the late 1950s through the 1980s, builders sprayed acoustic texture—affectionately or begrudgingly dubbed “popcorn ceiling”—across millions of American homes. It was fast, inexpensive, dampened sound, and hid imperfect drywall work without requiring hours of skilled taping and skimming.
Today, those bumpy overhead surfaces are among the first features modern homeowners want gone. Beyond casting harsh shadows and collecting decades of dust and cobwebs, popcorn ceilings visually date an interior faster than almost any other design element.
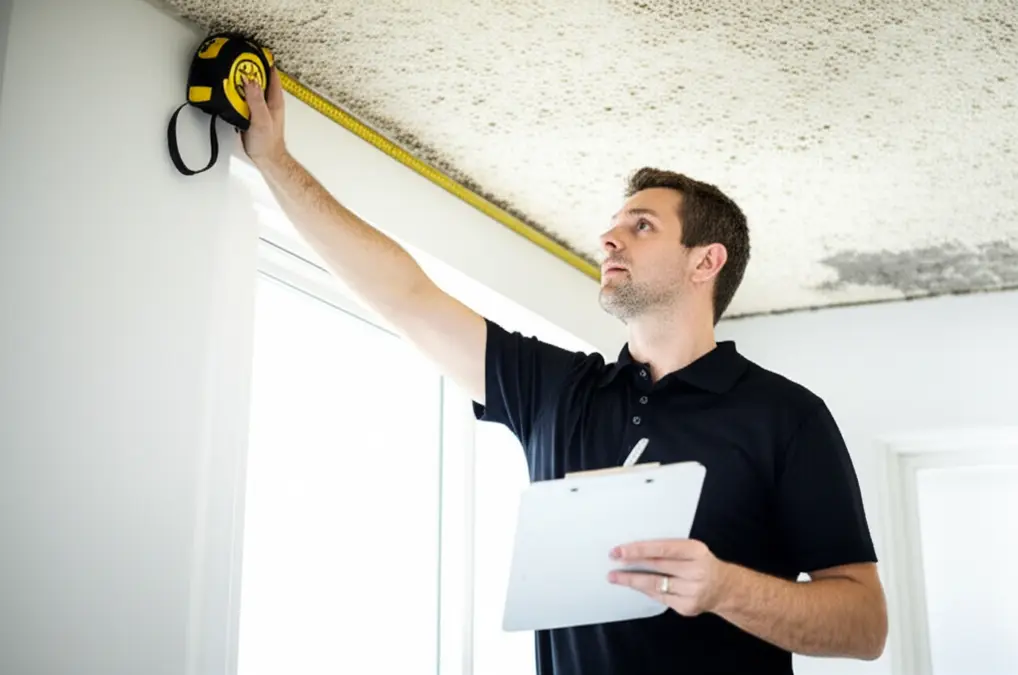
Scraping that texture away is not simply an afternoon cosmetic project. Before grabbing a ladder and a putty knife, every homeowner needs to confront a serious historical hazard: asbestos. Rushing into a popcorn ceiling removal project without proper evaluation can contaminate your living space with microscopic fibers that linger for years.
Understanding the relationship between vintage ceiling textures and asbestos, knowing how to test accurately, and choosing the proper removal or covering method are the vital steps to modernizing your ceilings safely.
The Asbestos Hazard in Textured Ceilings
Asbestos is a naturally occurring mineral fiber prized throughout the twentieth century for its tensile strength, heat resistance, and sound-insulating properties. In spray-applied ceiling finishes, manufacturers frequently blended chrysotile asbestos into the gypsum and paper-fiber mixture to act as a binder and enhance fireproofing.
The turning point came in 1978, when the United States Environmental Protection Agency banned the use of spray-applied asbestos products under the Clean Air Act. However, that ban did not mandate the immediate removal of existing inventory. Contractors were legally permitted to exhaust their remaining warehouse stocks. As a result, homes built well into the mid-1980s—and in isolated cases, the late 1980s—can still harbor asbestos-laden ceiling textures.
The danger of asbestos lies in its physical behavior when disturbed. When undisturbed and coated in paint, asbestos-containing acoustic ceiling texture is generally stable. The problem arises when the material becomes friable, meaning it can be easily crumbled, pulverized, or reduced to powder by hand pressure.
Scraping, sanding, gouging, or tearing down a popcorn ceiling fractures these mineral fibers into microscopic needles. Once airborne, these particles can remain suspended for days, easily circulating through a home’s central heating and cooling system. When inhaled, these needle-like fibers embed deeply into lung tissue and the surrounding lining of the chest cavity. The human body cannot break them down. Decades later, that exposure can manifest as debilitating and fatal respiratory diseases, including asbestosis, lung cancer, and mesothelioma.
Because of these severe health consequences, treating every pre-1990 popcorn ceiling as potentially hazardous is the only responsible approach.
Testing Before You Touch: The Essential First Step
You cannot identify asbestos by sight alone. Two popcorn ceilings applied in the same year can look visually identical, yet one might contain 15 percent asbestos while the other contains zero. The texture formula varied by brand, batch, and region.
Testing is mandatory before any physical work begins. You have two reliable paths: hiring a licensed environmental professional to pull samples or using an accredited mail-in test kit.
If you choose to collect the sample yourself, strict caution is necessary to avoid contaminating the room:
Turn off your HVAC system completely to eliminate air currents. Lay down a clean piece of plastic directly beneath the test spot. Wear a properly fitted N95 or P100 respirator and disposable gloves.
Lightly mist a small, out-of-the-way corner of the ceiling—such as inside a closet—with water mixed with a drop of dish soap. The liquid acts as a surfactant, keeping dry particles from drifting into the air during scraping.
Using a clean putty knife, gently scrape about a tablespoon of the damp texture directly into a heavy-duty, sealable plastic storage bag. Clean the exterior of the bag, seal it tightly, and label it. Patch the scraped spot with a dab of joint compound or spackle, then wipe down the area with a wet paper towel.
Send the sample to a laboratory accredited by the National Voluntary Laboratory Accreditation Program. The lab will run polarized light microscopy to establish whether asbestos is present and at what concentration.
If the laboratory report comes back negative, you can proceed with standard DIY removal methods. If the report comes back positive, your project options change immediately.
What to Do When Asbestos Is Confirmed
A positive test result does not mean your home is uninhabitable, but it completely rules out dry or wet scraping by an untrained homeowner. In many jurisdictions, removing asbestos yourself is either heavily regulated or outright illegal due to disposal mandates.
When asbestos is present, you have two primary options:
Certified Professional Abatement
Hiring a certified asbestos abatement contractor is the most thorough path forward. These specialists build negative-pressure containment zones with thick polyethylene sheeting, run commercial HEPA air scrubbers, wear full-body personal protective equipment, and use specialized wet-removal techniques.
They also handle legal transport and disposal of hazardous waste at designated facilities. While this is the costliest route, it permanently eliminates the hazard from your property and provides clearance documentation that safeguards future home sales.
Encapsulation and Covering
If abatement is cost-prohibitive, encapsulation is often the smarter, safer route. Encapsulation involves leaving the texture undisturbed and sealing it permanently behind a new surface layer.
Installing ceiling panels, tongue-and-groove planks, or quarter-inch drywall sheets directly over the existing popcorn ceiling seals the asbestos away, creates a pristine new surface, and bypasses the airborne risks entirely. Because the texture is never scraped or sanded, no hazardous dust is released into the living environment.
The Best Methods for Removing Asbestos-Free Popcorn Ceilings
If testing confirms your ceiling is free of asbestos, you can take on the removal yourself. Several methods exist, but their efficiency varies wildly depending on whether the ceiling has ever been painted.
The Wet Scraping Technique
Wet scraping is the gold standard for unpainted, asbestos-free popcorn ceilings. Water dissolves the water-soluble binders in the acoustic material, turning the brittle bumps into soft paste that slides off cleanly with minimal airborne dust.
Proper preparation determines your success. Clear the entire room of furniture. Cover the floors completely with heavy plastic sheeting, taping the edges to the baseboards. Run plastic up the walls as well, securing it with painter’s tape to catch damp debris as it falls.
Shut off the electrical power to the room at the breaker panel and remove all light fixtures and ceiling fans. Cover open electrical boxes with plastic and tape to keep moisture out of the wiring.
Fill a standard pump-action garden sprayer with warm water and a few drops of liquid dish soap. Mist a 4-foot by 4-foot section of the ceiling evenly. Do not soak the ceiling so heavily that the water saturates the drywall paper beneath; you want to wet only the texture layer.
Wait 10 to 15 minutes to allow the water to penetrate.
Take a wide drywall taping knife—ideally 10 to 12 inches—or a dedicated ceiling scraper fitted with a debris collection bag. Hold the blade at a shallow 30-degree angle to the ceiling and push forward in smooth, deliberate strokes. If the texture is sufficiently damp, it will peel off in clean ribbons. Work methodically across the ceiling, keeping your blade flat to avoid gouging the underlying drywall.
Overcoming Painted Popcorn Ceilings
If previous owners painted over the popcorn ceiling with oil-based or latex paint, water will not penetrate the surface. The paint creates a waterproof barrier that renders standard misting useless.
In this scenario, wet scraping will only work if you score the paint first using a coarse sanding screen or a specialized mechanical scoring tool. This pierces the paint membrane, allowing moisture to seep into the gypsum underneath.
If scoring proves too slow or labor-intensive, chemical popcorn ceiling strippers can soften the paint layer, though they require heavy ventilation and generate significant sludge.
Alternatively, a dustless dry drywall sander connected to a high-efficiency HEPA vacuum can grind down painted textures. However, this method requires a steady hand to avoid creating dips and ridges in the drywall core.
Finishing the Ceiling After Removal
Scraping off the texture is only half the battle. Builders used popcorn texture specifically because it allowed them to cut corners on the underlying drywall finishing. Once the bumps are gone, you will almost certainly find rough joint tape, visible screw heads, and surface imperfections.
Once the ceiling dries thoroughly:
-
Inspect the surface for gouges, peeling paper, or damaged tape seams.
-
Apply a thin coat of joint compound over rough joints, screw indentations, and incidental blade marks using a flexible taping knife.
-
For the smoothest possible finish, apply a complete skim coat—a paper-thin layer of watered-down joint compound troweled across the entire ceiling.
-
Sand the dried compound smooth using a pole sander fitted with 150-grit or 220-grit sandpaper while wearing eye protection and a dust mask.
-
Wipe away residual dust with a microfiber cloth.
-
Apply a high-grade PVA drywall primer. This step is critical; unprimed drywall and fresh joint compound absorb paint at different rates, leading to uneven sheen and visible flashing.
-
Finish with two coats of flat ceiling paint, which minimizes light reflection and hides minor surface variations.
Covering the Ceiling: When Scraping Is Not Ideal
Sometimes, skipping removal entirely is the superior choice—even when asbestos is not an issue. If your ceiling has multiple coats of thick paint, or if the underlying drywall is heavily deteriorated, scraping becomes an agonizing, messy ordeal.
Covering the popcorn texture offers a faster, cleaner route to a modern finish:
Drywall Overlay: Screwing 1/4-inch or 3/8-inch lightweight drywall sheets directly into the ceiling joists through the existing popcorn ceiling provides a brand-new canvas. You only need to tape and finish fresh drywall seams, entirely avoiding messy scrape-downs.
Wood Plank Ceilings: Tongue-and-groove pine, cedar planks, or engineered shiplap can be nailed across the ceiling using furring strips secured to the joists. This introduces architectural warmth, conceals the old texture permanently, and eliminates drywall taping altogether.
Ceiling Tiles: Modern coffered systems or decorative surface-mount tiles adhere over existing flat substrates, giving rooms a custom, upscale appearance with zero scraping.
Transforming a dated, heavy popcorn ceiling into a sleek, smooth surface dramatically opens up a room and reflects modern light beautifully. By prioritizing asbestos testing first, you protect your household health and ensure your renovation project is both stunning and safe.